Publish completed VidFlow videos to YouTube from WordPress using your own Google OAuth credentials.
Content reviewed: October 20, 2026.
What YouTube is in VidFlow
YouTube is a publishing destination, not an AI generation provider. You can generate with Hailuo or Google, then publish a completed video to a connected YouTube channel. More publishing destinations are planned.
What publishing does
- Connects a YouTube channel with Google OAuth.
- Uploads selected completed videos.
- Stores publish logs and published links.
- Can display YouTube-hosted playback on the front end when settings allow it.
Publish before embedding
We recommend publishing before embedding. Publish your completed video to an available publishing destination first, then use its published player on your site. YouTube is currently available; more publishing destinations are planned. This reduces video bandwidth and playback load on your WordPress hosting.
Wait for the upload and processing to finish. For YouTube, use public or unlisted visibility and allow embedding. In VidFlow AI → Settings → Publishing → Frontend playback, set Default published destination for embeds to YouTube. Then insert the VidFlow block or shortcode and check that the saved page uses the YouTube player. Publishing alone does not switch playback while this setting is Off.
Requirements
- Google Cloud project.
- YouTube Data API v3 enabled.
- OAuth Web application client.
- Authorized redirect URI that exactly matches the value shown in VidFlow AI settings.
- A test user if the Google OAuth app is still in Testing mode.
Setup steps
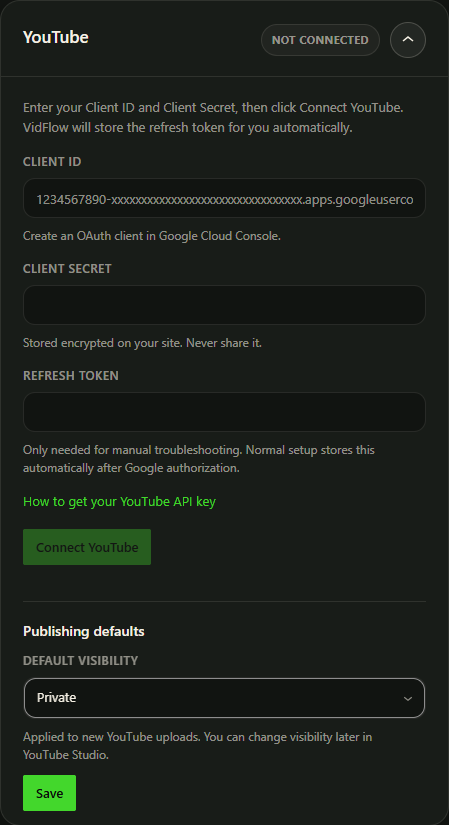
- Open VidFlow AI -> Settings -> Connections -> YouTube.
- Copy the redirect URI shown by VidFlow AI.
- Create or update the Google OAuth client with that redirect URI.
- Paste the Client ID and Client Secret into VidFlow AI.
- Save credentials.
- Start the OAuth connection and approve access for the channel.
- Test the connection.
Publishing steps
- Open Video Library or a supported project/merged-video surface.
- Choose a completed video.
- Open the Publish dialog.
- Set title, description, tags, category, and privacy options.
- Queue the YouTube destination.
- Watch Publishing Activity for status and published links.
Save details and queue deliberately
Enter an explicit publishing title and review the selected destination and visibility before queueing. Use the Publish dialog’s Save action for edited details; Queue or Retry saves pending details before starting that operation. Closing with unsaved edits asks whether to discard them. A YouTube playback link does not replace the original downloadable file.